Playing with GPS

I must have spent too much time hearing the other Elecraft K3 owners talk about fancy precision oscillator stuff because when the idea got into my head that I could make a really ‘simple’ embedded NTP server with the bonus side-effect of a GPS disciplined oscillator, I could not get the idea out of my head. So that is my latest project. I started by reading loads of hardware spec sheets and looking at various required components. Then after I had a pretty good draft of what the plan was, I started ordering engineering samples. The hope was to do this with purchasing as little as possible in the way of parts. So far, I have acquired a good portion of the parts and hope to get a few more before I have to go get the rest on my own.

One of the things I DID purchase was a GPS device. I didn’t want any old GPS receiver, I wanted one that had a 10kHz output that is in sync with the 1 PPS output. Really this meant that I had to go with an older (used) model. But because they are a bit rare these days, that didn’t really save me much in the way of money. I was giddy when it came in the mail. I started poking at it. Documentation was scarce. Finally I figured out that it has an Oncore GPS core in it, which finally led me to some more detailed documentation about the serial interface. After that, it was just a matter of whipping up some software to read and write the necessary packets. Then the fun started. I started logging data and learned how to make use of some of it. I have a handful of commands that I use to set it up and receive location updates, satellite position, and leap second information.

After looking at the location information that the receiver was providing, I moved on to the GPS location. Then I decided to make a tool to visualize the satellite positions. First I did this using ASCII art in the shell (which turned out surprisingly well). Then I added the traces of the satellite positions over the last 24 hours. This showed me some interesting things. First of all, it showed me that I had my plot wrong. (I had the north pole over in the east…. Ooops). Second, it was more a general coverage plot, since characters aren’t quite so precise as pixels. This convinced me to move on to a pixel-based plot, using pygtk. This one started out simple, but got fancier as I realized that it would be easy to add a feature here and a feature there. The gtk version lets you mouse over a satellite and it shows more detail about that satellite, like the ID number, lock status, azimuth and elevation, etc. It also shows the trails of the satellites in dots that are color matched to the squares that represent the satellites. If the satellite is locked, then there is also a circle around it. The plot updates in real time with the changes in the log file from the GPS device.

Lego CW Iambic Paddle

As I read the April 2011 edition of QST, they featured a picture of a CW key made of Legos on page 20. I thought to myself that this was the kind of project I was up to. Rather than a straight key like N1LF made, I decided to go with an iambic paddle. You might be asking yourself, why would Vernon make a lego paddle when he has a cool CW touch keyer that he finished 2 months ago? Two reasons: 1) because I am a tinkerer, and 2) the touch keyer is way to sensitive and lacks the tactile feedback (I think) I want. The capacitive touch sensors I used don’t seem to be very adjustible, which is unfortunate, because when I finally assembled it in the box, the key sensitivity went way up. It can sense my finger about 1/16th inch away, which means it is transmitting dits and dahs before my brain gets the tactile feedback from touching the cold aluminum. Let’s see what Legos can do for me.

When I was a kid, I got some Legos Technics and loved them. I spent hours building things. I even went as far as rigging up a motor to work with them (since my set didn’t have one). I kept them all those years and pulled them out this morning an whipped up a iambic paddle before work. Nathan was impressed with my skills and was happy to find that I used MY Legos and not HIS Legos. The design is all original and was mostly constrained by the variety of pieces that I had on hand. But it seems to be well built and not too wobbly. In other words, you can use it just fine, but you can’t really slap it around. The only non-Lego parts are the bolt and washers for paddle adjustment, the rubber band for paddle return, and the aluminum foil for the contacts. I found an old stereo 1/8 inch plug and cord in my junk drawer and wired it all up at lunch time. It works like a champ. Maybe not so smooth as a Begali Magnetic Pro paddle that I am dreaming of, but maybe it will get me there until I can save my Euros to buy one.

DDRR for the car

I got bitten by a little APRS bug this week, right after I finished assembling my K3 while waiting for the power supply and coax to arrive. I wanted an antenna we could mount on the top of Lauren’s minivan for any roadtrips we might take. But because it is not MY car, there are quite a few more restrictions. Like: no holes in the car; no physical changes to the car; not ugly (beauty is in the eye of the beholder?); why do we need an antenna again? I also placed the restrictions on it that it must be cheap (or free), easy to build, and work at least as well as my SMA-24, which is my most-commonly used HT antenna.

I started off with a Google search of homebrew 2m antennas to find that pretty much people make j-poles or 1/4-wave vertical antennas; neither of which look good on top of a minivan. I searched more, for low-profile antennas. I suppose I could have come up with a coil-loaded whip of sorts, but I wanted something cooler. I finally found a great write-up on how to build a 2m DDRR antenna. I had never heard of a DDRR antenna before, but being fairly new to the hobby, there are a lot of things I have never heard of. DDRR means Directional Discontinuity Ring Radiator or Direct Driven Ring Radiator, depending on where you look, was originally invented by J.M. Boyer for use on ships. It consists of a 1/4-wavelength element, grounded at one end and wound into a single coil, a short distance above ground. Because I found W5GVE’s article before the W6WYQ’s 1971 QST “A 40-Meter DDRR Antenna” article, I followed the W5GVE instructions, which differ slightly. The biggest difference being the height of the antenna and the feed point. I may have to try again following W6WYQ’s plans.

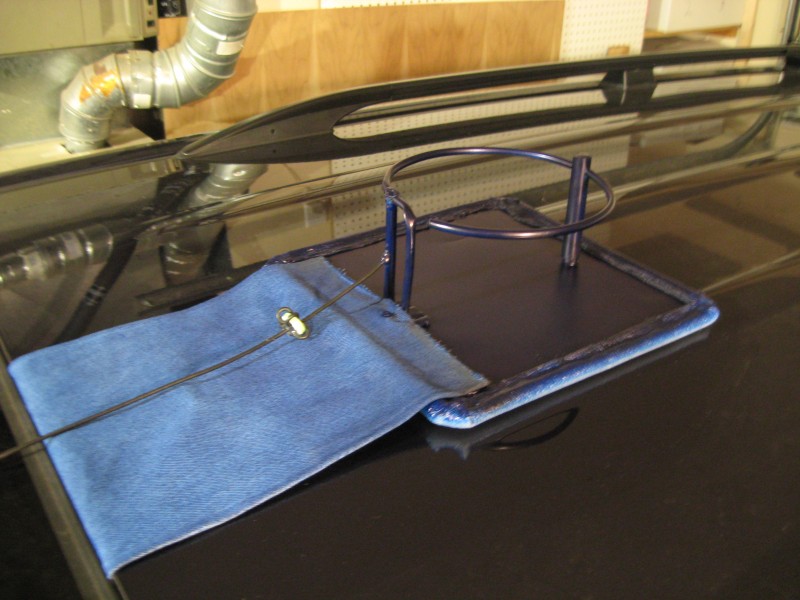
I started with a piece of 1/4″ copper flex tubing and bent it around a #10 tin-can, which is just about 6 inches in diameter. I made a 3 inch tail with a short flange for the ground contact. For the ground plane, I found a piece of ducting sheet metal lying around. With a small piece of angle-iron and some #4 metal screws, nuts and washers, I made a secure mount for the radiator, which was now starting to look like a heavenly halo (so say the kids). Using a small strip of tin soldered to the feed wire and crimped around the tubing, I was able to adjust the feed point for optimal radiation. Once in place, I slipped the feed wires into an old empty pen for mechanical reinforcement. I marked the spot an soldered the feed point in place. I used another screw and nut to connect the shield of the coax in place below the feed point, mounting the pen over the nut. For more stability, I used an old Crayola marker tube on the side of the ring opposite the ground. I added padding to the bottom and sides so it wouldn’t scratch its precious bearer, painted it for camouflage, and viola! it was finished. Oh, I almost forgot to point out that I also added means to mount the antenna: a strip of fabric connected to the front and a rope across the back to keep it down. I think it will serve usme well.

For testing throughout the development process, I used my HT at 0.5W and 5W to transmit APRS packets and to use voice. APRS is nice because if it hits a digipeater I get my packet transmitted back to me. Voice is nice because I can get a bona-fide signal report. I am not sure about the actual electrical specifications of this antenna because I do not have an antenna analyzer, a SWR meter, dip meter or anything of that sort, but it works and I think that is a good indication of how well it works.

I suppose the real test is if Lauren will let me use it on her minivan. See my antennas album for more pictures.

Foray into HF

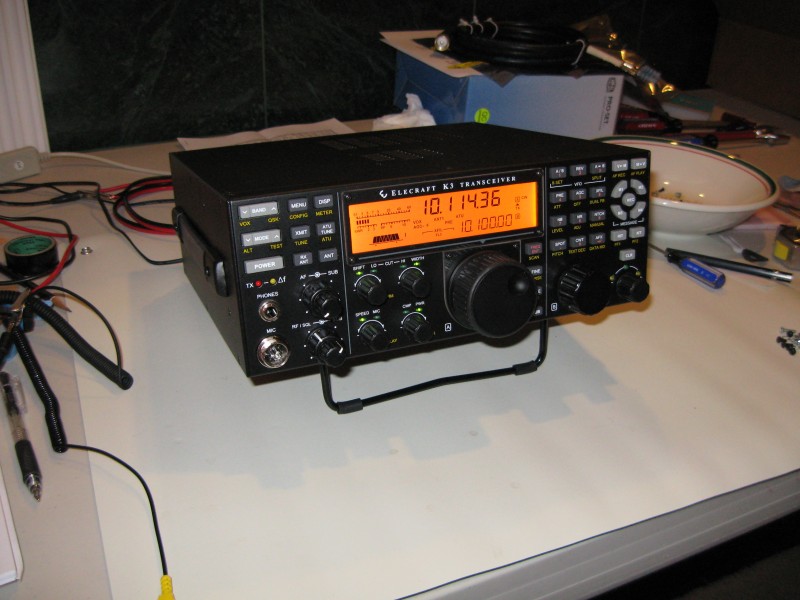
I have been saving my pennies (er, dollars) for almost 18 months so I could buy myself a shiny new HF base station radio without breaking the bank. I ordered stuff this last Monday in hopes that it would get here in time for my birthday. I was pleasantly surprised at how fast Elecraft processed my order. It arrived Thursday evening. I started assembly last night, worked some more this morning and afternoon and now have a fully assembled K3/100 sitting on my work table.

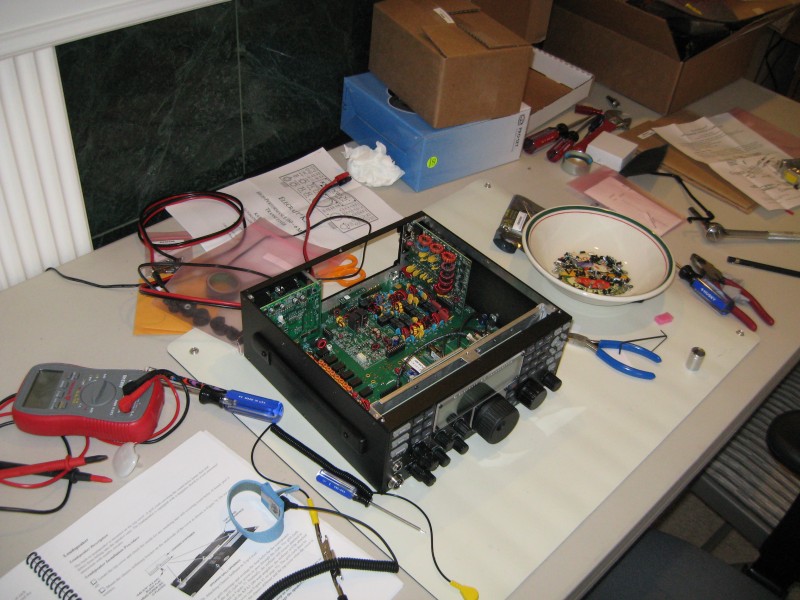
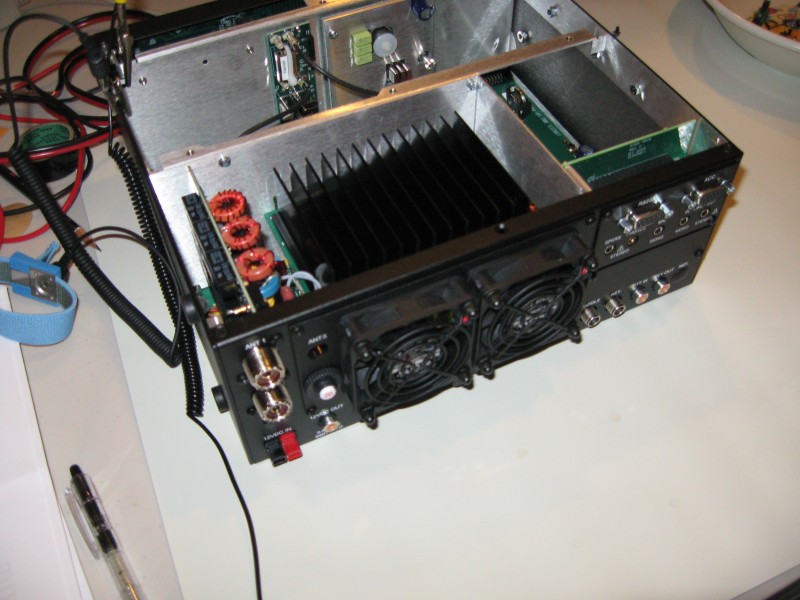
I was very impressed with the assembly instructions provided. They were very clear, step-by-step instructions with plenty of diagrams and pictures to make sure that nothing went amiss. I am very happy with my purchase. Now I just have to wait until Monday and Tuesday for the remaining shipments of gear and supplies to get my HF radio on the air. I am still missing my 30A power supply, coax, and antenna.

Here are some pictures of the assembly process….

A USB CW Keyboard

After getting my amateur radio license without having to pass a CW test, I felt a little bit cheated, so I vowed that I would learn CW and do my best to help keep it alive. After all, that is one of the two things that I remember about ham radio from my childhood (beeping and antennas). In the past year and a half, I am sorry to say that I have not yet mastered CW. But I have learned a lot about learning CW. 🙂 Baby steps, right?

Because one reason I decided to get into amateur radio was to give myself an outlet for my tinkering needs, I felt it was only fair that I should devote some of this tinker time to learning CW. How do you do that? By making a touch-sensitive paddle with an iambic keyer. This is what I set out to do about six months ago and am proud to say that I have a working finished product to share today. Much of my inspiration was from the fine folks at CW Touch Keyer. Their products were very alluring and I almost bought one of them instead of building it myself, but they didn’t meet all my requirements. (Their Master Keyer was not available yet, which I think does meet all my requirements except the actual paddle part, which you must supply yourself.)

My design goals:

  • Touch sensitive paddles
  • Act as an USB HID keyboard
  • Small
  • Variable, persistent settings
    • WPM 5-100
    • Variable sidetone frequency 100-1000 Hz
    • Various keyer modes (iambic a/b, ultimatic, bug, etc.)
    • Memories (with auto repeat)

I am happy to report that I have met these goals and more with the N7OH CW-KBD. For the low, low price of $150 you can buy the parts to build your own. I think if I had plans to make this a commercial venture, I would have to cut down on my costs. First to go would likely be the Teensy because if I swapped that out for a Microchip PIC, I could also get rid of the two capacitive touch sensors. Putting that all on a single chip with a small single board, I could certainly reduce the price some. But that is a story for another day.

I started acquiring parts for the keyboard back in the April/May time frame. I started with the basics: I needed the Teensy so I could start tinkering and get back into the AVR embedded programming mode; I needed the capacitive touch sensors so I could get a board designed and start working with them (they only came in tiny surface mount packages so I had to create a breakout board for them); I also ordered some of the other stuff I would eventually need to save on shipping later. Then I excitedly jumped into Eagle and created my breakout board. I actually created a couple of designs. Since ordering with BatchPCB has a base cost plus a per-square-inch cost, I decided that ordering a couple of different designs would not be an issue. And it turns out they sent my twice as many as I ordered (probably because the designs were so small and they had extra room that wouldn’t fit anything else.) That was a really fun process though; I have never designed a PCB before.

I don’t know how many hours I spent reading through the 408-page ATMega32U4 manual. I pulled out some old AVR code I had written in college and tried to make it work. I spent about as much time refactoring the old code as I would have spent writing new stuff. Finally I had some basic hardware support for timers, PWMs, and USB (with the help of LUFA.) From there, I moved back to the non-embedded space to try out the main portion of CW encoding and decoding. First I whipped up a program that would write out the proper timing for dits and dahs if given a string of text to type. It didn’t take very long for that, but it was much faster to have printf and instant feedback without reprogramming a device. I ported this code back to the Teensy (with minimal changes, thanks to my portable coding techniques) and was able to get a simple program up and running that would blink “hello world.” at me once a minute. I moved back to userspace and figured out how to use raw events to emulate interrupts and user timers instead of hardware timers. I extended my program to with a state machine that would read in dit and dah paddle presses and encode them into a stream of CW that can be decoded into ASCII and pushed up to the HID layer. My original state machine was too complex and introduced timing errors into the encoding, so I ditched it for this simpler version.

It took me a while to hunt down all the itty-bitty timing issues. Sometimes there were weird little hiccups in the output that I couldn’t explain. I did finally hunt them down and get smooth operation though. Then I went and filled out the big wish list of coding features (memories, keying modes and speeds, etc.) This took some time but was quite fun. I also found and fixed a few more bugs that I uncovered while I was at it. After I had the list all checked off, I still didn’t have the nerve to permanently affix all the parts. Up until now, they were all connected on a solder-less breadboard. I decided to get crazy and reduce the power consumption. It’s not like it was a pig or anything; it was already using a low-power sleep mode and was completely interrupt driven. I knew that I could reduce the 40mA power requirement with a bit of skillful coding. While it did not have any busy loops, there were a lot of wake-ups that were not needed. For example, part of the architecture is a 1ms timer that allows things to run with a 1ms accuracy. But what if nothing needs to run? It would still fire. I managed to have the things that didn’t need to run inform the timer and then have the timer shut down if there were no users. This meant than if the paddles were not pressed, it would go into a deep sleep state (<10mA) and then would wake up as soon as a paddle was pressed.

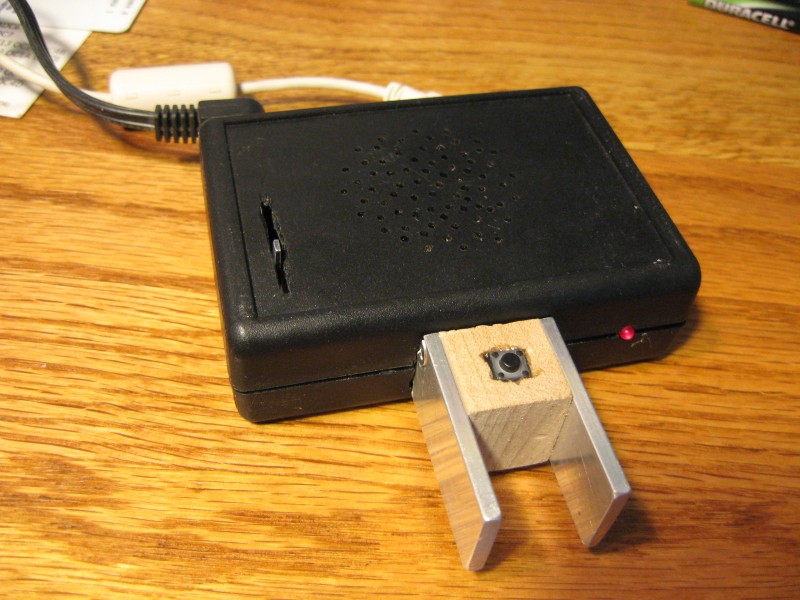
Finally, I got brave and soldered all my parts together on a prototyping board and put it in a little plastic case. I drilled holes in all the right places to allow for the connectors (power, USB mini-B, key out, paddle out, an LED, a reset button, the speaker, the volume control, and the paddles). I skillfully mounted the two aluminum paddles on a small block of wood and then cut a groove in them to make them have a solid mechanical connection to the box. I am pretty proud of the box. After I had it all assembled, I realized it was too light weight and would move around whenever I touched the paddles. I fixed this by adding some screws to the bottom so I could screw it to a plate of lexan.

The architecture of the project goes something like this:
paddles intput dits and dahs that get synchronized by the timer. Depending on the keying mode, a continuously pressed paddle may or may not continuously send dits or dahs. Also depending on the keying mode, different things may happen if both paddles get pressed at the same time. The input state machine handles all of this, resulting in a queue of dits, dahs and spaces that are ready to be consumed. The output state machine looks at the queue and sends the bits to the output pins (the buzzer and the paddle/keyer pins) as well as trying to decode the stream of dits, dahs and spaces into characters. Every recognized character gets enqueued into the HID queue, which gets sent off to the computer if it is plugged in. In addition to the two paddles, there is also a single button that can enter and exit "Command Mode." Command mode allows the user to change various parameters such as buzzer frequency, keying speed, keyer mode, paddle orientation, etc. All of these settings are saved in EEPROM, so they are persistent across power losses.

Radio Frequency Exposure (RFE) Calculator

So far in my amateur radio career, I have not been able to offer much that may be of use to other hams. That changes today. A while back, when I was dreaming about where to put my antennas safely, I did a lot of research about radio frequency exposure. I poured over OET Bulletin 65, which details the FCC’s limits on human exposure to RF electromagnetic fields. They have formulas and tables and forms to fill out. It is all wonderful and fine, if you live in the 1960s. Welcome to the 21st Century. We live in a world of computers to do all that number crunching for you. I looked around for any web-based things that would help, but the closest I could find was power density calculator written by W4/VP9KF. This is fine if you want to do it for EVERY band on EVERY transmitter each time you make a change to your station. Plus, it means that I have to transmit all that data to his PHP script, which does the calculations and sends them back. We have this great thing in web browsers called JavaScript, which is more than powerful enough to do the work. I set upon creating a JS-only version of his creation. But it still lacked the memory—I would still need to re-enter for each band for every change. And it wouldn’t let me view multiple bands at once. Bigger calculator!

This is where my offering steps in. My requirements:

  1. Save my data so I don’t have to re-enter everything in every time
  2. Something I can share with others, without saving their data on my server
  3. Let me add, edit, delete at will
  4. Something that can show all my transmitter/antenna/connection information at once

Seems easy enough, right? It was the first two that really got me stuck. I whipped up a little JavaScript ditty that fulfilled number four in very little time at all. Number three was dependent upon the first two and was technically the hardest, but once I had the first two figured out, it was only coding, which I enjoy.

And this is what I came up with: N7OH RFE Calculator. Take it for a spin, share it with your friends. Upon your initial visit, it may not look like much, but if you move over to the “Import/Export” tab, you can press the “Reset to sample data” button and see it in action. Please offer suggestions and comments if you find it to be too difficult to use or see something that might make it better.

As for fulfilling my four requirements, the first two were done once I learned about local storage with HTML 5. This means that your web browser is storing the data. Not as a cookie, but similar. Cookies get sent back to the server with each request. Local storage is meant to be persistent data that a web page can access via JavaScript to be used locally. This means I can save my data on my machine and your data on your machine. I can host the page for everyone, yet not save everyone else’s data on my server. The add/edit/delete requirement was probably the most fun I have had with jQuery to date. And I hardly scratched the surface of what it can do. Lastly, the glory of the Results tab just makes me weak in the knees. Okay, not really, but it is the crown jewel of the whole application. It shows all the stuff you want to know about your radio setup.

Combating SpamBots

The war against spam is ever escalating. Two weeks ago I took my anti-spam tactics to the next level. I want people to be able to post comments to my website without registering. Anonymous comments (or rather unverified authors of comments) should be available if the webmaster sees fit. But I have found that in the past several months that comment spam was getting to be a real problem. I logged in one day and found that there were several hundred spam comments that had gone unnoticed for quite some time. At that time, I did not have any anti-spam measures. I looked around and added a CAPTCHA to the comment form. That stopped most of the spam, but the determined spammers were still getting through.

IP addresses in failed CAPTCHA log Number of failed CAPTCHA responses
212.117.164.8 514
219.252.44.66 250
125.64.96.21 160
69.46.27.117 158
61.145.121.124 138
206.224.254.5 111
212.116.220.224 78
203.77.204.82 78
203.198.126.43 73
211.115.75.169 72
221.214.27.252 69
192.104.18.19 60
218.25.99.135 60
212.116.220.154 54
200.123.147.169 54
95.154.242.207 52
89.233.152.157 50
2700+ other unique hosts <50 hits per host

In the past 2 months, I have logged more than 14,000 failed CAPTCHA attempts. Most the unique hosts have one or two failures, but more than 1,000 unique IP addresses have four or more failures. At some point you have to draw the line and I draw it at four. Or maybe three. One or two failures can easily be done even if a bona fide person is responding. But usually only spambots are dumb enough to get more than three failures.

I can characterize the failures and many of them seem to be of a certain forms: hit twice in rapid succession and then give up for a while. Two hits alone is not usually successful — it usually guesses an empty string or 0 or 1. The problem is if you are using a math CAPTCHA, those can be the right answer. And obviously, if the spambot keeps at it two at a time, it will eventually guess correct and be able to post. I found that the spambot was able to crack several of the CAPTCHAs I offered: ReCAPTCHA, math, word list, word order, etc. Other than ReCAPTCHA, the other ones can be cracked by random entries. I am not sure how they managed to crack ReCAPTCHA. But it was starting to make me angry at all the spam. Finally, in addition to CAPTCHA I resorted to using comment moderation, requiring me to log in and manually approve all comments. I really don’t like this because sometimes I forget. Then the comments get old and people think I don’t care.

I did a little hunting around the Drupal front and found Mollom. This is a nice line of defense against spam. But I read elsewhere that in some cases it wasn’t catching it all. Remember that spambots are in it for the speed and money, so their GET to POST times are very short. I whipped up a little module that checks that. All you super-human typists had better slow down when commenting on my forms. Then I took a page out of Ignacio Segura‘s book and added a honeypot to the comment form to my little module as well. Though you will not see it, (unless you are looking at the html source, reading with a non-CSS compliant browser like lynx, or are a spambot) it is meant to be left empty and will cause a form rejection if it has any text in it.

Then one step more. Because what is escalation if you are not really accelerating? I noticed that once spambots did get in that they usually were ‘advertising’ for companies of ill repute. Offering things like p1Lz and other items to EnH4Nc3 certain parts of one’s body. But in order to get around blacklists for certain words, they intentionally misspell what they are advertising for and also have links to obscurely named domains (which are usually not words either.) I figured any rational thinking human being would spell at least 75% of their words correctly (and that includes things like spambot and acronyms and other non-English shortcuts). So my latest addition to the spam warfare is PHP’s pspell library. So all you spammers out there had better spell it right.

Then as the final blow to spammer (and bad spellers everywhere) I added a “three strikes and you are out” gotcha where if you fail the previous tests more than a given number of times, you will get added to the blacklist. All entries in the blacklist are forbidden to access any part of the website. Permanently. And it seems to work. I have not seen any spam get past the filters in the last two weeks that this has been in effect. Let’s hope this lasts.

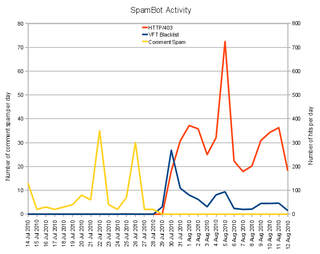
I was curious about the actual counts of things, so I whipped up a few SQL queries that gave me the statistics that I wanted. I pushed it all into OOo and came up with this fine chart. There are a couple of things to note:

  • This is about a month of data.
  • The yellow line (number of daily comment spam posts) is on the scale to the right. The other two lines are on the scale to the left.
  • The first day I tried all this stuff out (29 Jul) I didn’t actually have the blacklist implemented, which accounts for no HTTP/403 entries on that day
  • There has been zero comment spam since 29 Jul. It is not for a lack of trying.
  • The blue line shows the number of newly recognized SpamBot IP addresses.
  • The red-orange line shows the number of attempts from previously identified SpamBots that got rejected by the blacklist.
  • I find if quite funny that the HTTP/403 line looks like my server is flipping the bird at the SpamBots. That’s what it is doing…. And no, I did not doctor the data.
  • I see that there seem to be trends or waves of spam. That is fascinating and frightening all at the same time.

Do you do anything to combat spam on your sites? Obviously comment moderation is the only truly perfect filter, but it requires so much work. Especially when I really don’t get that many human comments per day, but loads of spam attempts.

Today ends with Vernon: 15, SpamBots: 0.

Server Tinkering

I was born to tinker. I think this must be the opposite of the optimizer. I see a project in anything that I could tweak to make it a little better. This not only applies to computers, which are the easiest thing to tinker with, but food, DIY projects, and more. This particular post is centered a little more around computer tinkering, just as a warning to the technophobes.

My host for the past 2+ years for this server has been Site5. They have been adequate. I had never used a Web Hosting Service before so this was a whole new experience. Moving there from a private server took a lot of tweaking. Server wise, they were pretty good. I think my site got its fair share of the server pie, but it is not a really demanding site. Service wise (meaning the people), I think they only get 4 out of 5 stars. Whenever I had a problem, they did finally resolve it, but it took some work and push-back from me to make it happen. Usually the first contact would try to blow me off. I would patiently explain that they were contractually obligated to fix the problem and then ‘level 2’ support would fix it. I could deal with this if they had all the features I wanted, but I wanted more. Sure, they have ‘unlimited’ disk space (as long as you don’t use it), and unlimited bandwidth, which with my vast sea of devoted readers, I don’t really need. But what I do need is IPv6. And they have no plans for that (at least I am privy to none).

So I jumped ship. The market for dual stack hosting is not yet very big so there really aren’t that many service providers yet. I finally found BurstNET®, which seemed to offer IPv6 as well as very low-priced VPS (Virtual Private Server). So low, in fact that I could get a whole VPS for less than I was paying at Site5. That’s very cool. Being a tinkerer, I really need w00t. Still, since BurstNET uses OpenVZ technology instead of Xen or KVM, I don’t quite have complete control over everything. I don’t get to configure my network, for instance. But I do have two static IPv4 IP addresses; doing my part to reduce the remaining pool of IPv4 addresses. And after a quick service request, they granted me two IPv6 addresses. Yes, only two, not an entire subnet. I thought that was odd, but hey, at least it is something. Their service department has been nothing but good. I have made several requests for help:

  • Request for IPv6 connectivity
  • Request for reverse-DNS mapping IPv4 and IPv6 addresses
  • Request to get ip6tables working

All there responses were quick and positive. This was the best service I had ever gotten and for what? Yup, $5/mo. This month I got more than my money’s worth in support man-hours. I am hoping that the tinkering I have done over the last week is sufficient to have my VPS in decent shape.

Also as part of my tinkering, I managed to set up my VPS as a master name server for the three DNS zones that I control (mauery.org, mauery.com, and my he.net IPv6 arpa reverse zone). Then, using HE.net’s DNS service, I can push to their DNS slave servers. This means that I have five geographically diverse, topologically diverse, redundant nameservers. So even though almost nobody reads my blog, you will never not be able to track it down.

Now on to the next tinkering project….

MythTV 0.23 running on Lucid

Bella, my mythbox has been overheating for the past few months when the furnace has been running. Whenever we would watch HD content, decoding (and likely resizing) the stream to our screen would take too much CPU horsepower. Watching an HD stream would use nearly 100% of one of the two 2.1GHz Athlon cores. Then her over-sized, quiet fan would kick into high gear. Sometimes I would feel sorry for her and pull the top cover off to let out all that hot air. VDPAU has been around for a while now, and Bella’s video card is supported, so I have been itching to upgrade her to Lucid. I started a couple of weeks ago by installing to an external USB drive. This way, I didn’t interrupt the regular programming. I could boot to the drive, tinker, fix, test, etc., and then boot back to the main drive when I was done.

I tried to copy over the original database so I didn’t lose any settings, but that didn’t seem to work very well. The database upgrade scripts kept dying on me. I finally rolled up my sleeves and dug in a little deeper. The error messages that it was giving me were about duplicate columns in tables. I am not sure how they got there, but with my mysql hacker-foo skills, I manually altered the tables to drop the columns, which allowed the script to successfully update the mythconverg database. Then it seemed to be working. Kind of.

Bella has a little USB card reader that does a variety of memory card types. For whatever reason, when probed, it reports that it has devices there already, even though there are no cards plugged in. It reports /dev/sd{d,e,f,g}. For whatever reason, mythfrontend likes to probe devices and try to mount them??? When it runs into these non-devices, it segfaults. I finally just decided to unplug the card reader from the motherboard and mythfrontend starts up just fine.

With Myth finally up and running, it doesn’t take long to make sure all the settings are good. I kick off a show and notice that the processor is still running at full speed. A little more digging and I find the VDPAU setting screen. I turn it on and viola! CPU usage drops to 40%. I was a little underwhelmed by this number, hoping to see something more on the order of 5%. I don’t know if it is because of the stream type or maybe my hardware? The video card is several years old and one of the earlier ones that does support VDPAU. And the stream is whatever the broadcasters in my area are using. I assume it is MPEG2, while H.264 is what VDPAU would prefer? Anyway, something is better than nothing. I just hope that the reduction in CPU thermal requirements is sufficient.

AVR junkie paradise

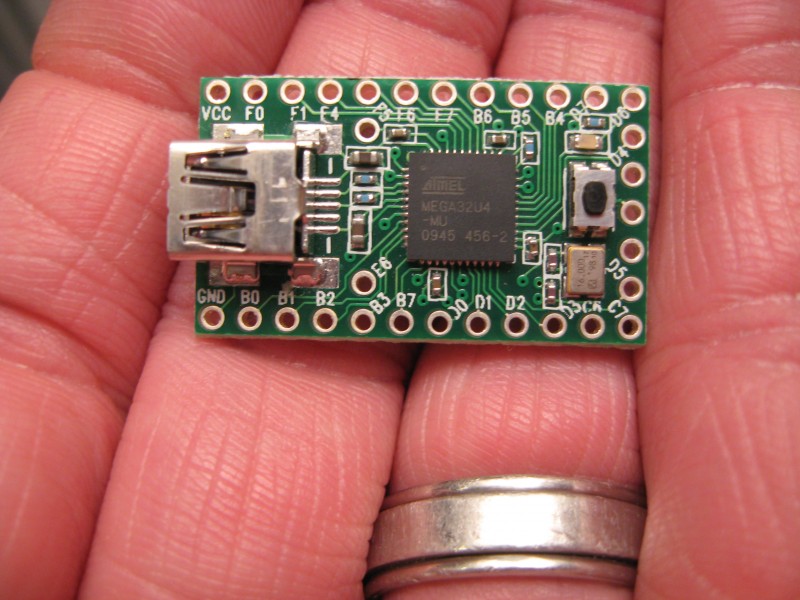
I have been pining for some shiny tiny hardware that would look good in the CW (Morse code) paddle that I am making. Arduino had been a first choice for several days. I was on the verge of buying a couple of boards when I came across PJRC’s Teensy. It really is teensy. But it incorporates a little bit of hardware that I had not seen in a proto-board before: Atmel’s 8-bit MCU with USB support. The Teensy has the Mega32U4 processor at its core, which has 32kB of flash, 2.5kB SRAM, and 1kB EEPROM, support for up to 6 USB full-speed functions, and lots more of the standard AtMega goodies. I think one of the coolest things about this board is that once you have a bootloader in place, you can flash the system over the USB connection that is already has. No need for an extra programmer and more cables. And even if you screw up your application, the bootloader is safe, because it is protected by separate lock bits.

To make a short story even shorter, I ordered two Teensy boards over the weekend and they arrived today. Fast shipping. (It helps that PJRC is less than 20 miles away.)

I am in Atmel junkie paradise.